
It’s finally happening. Google is sunsetting Universal Analytics and replacing it with Google Analytics 4 (GA4) on July 1, 2023. While you still have several months before the switch, we recommend getting started as soon as possible.
GA4 brings about a whole host of benefits that make it easier than ever to track the user journey.
But why is GA4 so good? It represents an evolution in Google’s analytics capabilities. Brands that switch to GA4 can leverage its powerful features to give themselves an advantage over the competition.
Why you should move from Universal Analytics to Google Analytics 4 now
Part of the reason we recommend switching to GA4 is that it takes some getting used to. The UI is new, reports have a new look, and menus like Behavior and Goals have been replaced. The analytics capabilities are much more advanced than they were with Universal Analytics.
The good news is that GA4 is easy to use but has an initial learning curve. You don’t need a statistics degree to make use of GA4 even if it looks overwhelming! Learning the nuances of how GA4 works now is a great way to prepare you for its future updates.
There are some limits to GA4 right now, but we expect Google to add in even more features over the coming months.
How you benefit from GA4
GA4 brings about a whole host of benefits. For example, retention specialists will enjoy the new focus on lifecycle tracking to improve their campaigns and keep customers coming back.
Here are the ways your brand benefits from GA4:
The customer journey is easier to track
The core focus of GA4 is to track users and their interactions–which are now captured as events.
This new focus on an event-driven data model means you can now use a single set of metrics and dimensions to look at web, mobile, and app data, allowing for easier aggregation and analysis.
For example, a user may visit your website on their mobile device, revisit it on their desktop computer, and then make a purchase on your app. GA4 gives you the tools needed to track and stitch together user journeys more accurately.
Analysis tools are now more focused on user engagement
As well as being able to collect and aggregate more data, Google has made it more intuitive for marketers and analysts to dig into user-centric reports, by aligning report menu sections with the customer journey.
The new ‘Lifecycle’ menu is broken into Acquisition, Engagement, Monetization, and Retention. There’s also a separate ‘User’ section that focuses on user demographics and technology.
Create high-performing ad campaigns with new audience tools
GA4 comes with new measurements and integrations, resulting in more powerful audiences, which means better ROIs on ad spend. For example, let’s say you’re an eCommerce brand running an ad campaign across mobile and desktop devices, and web apps.
- A user comes onto your site through a browser on mobile, provides their phone number for a 10% discount coupon, adds products to their cart, but doesn’t complete a purchase.
- They come back through a desktop computer because of a retargeting ad using a different browser and begin the checkout process. But they get distracted and don’t complete the checkout.
- They see another ad and finally complete the checkout using your mobile app.
Before GA4, it would be nearly impossible to optimize ad spend for these kinds of user journeys. Now, if you configure your website and apps correctly, you can stitch user journeys together and avoid wasting money.
Additionally, new predictive metrics being released by Google will optimize those audiences even quicker and more intelligently. This will allow you to create audiences to reach higher-value customers and analyze why some customers are likely to spend more than others, so you can take action to improve your results.
Simplified goals and events setup
One of the most empowering benefits of GA4 for non-technical audiences is that events can be created with no coding experience needed.
What used to be complex is now straightforward, which will be particularly useful when transactional functions, such as application forms and checkouts, are hosted on a sub-domain or third-party site.
GA4 pre-creates a number of actions and events. Previously requiring manual setup, some default options include clicks, scroll behavior, transactions, file downloads, and a user’s first visit.
Some eCommerce goals (more on that later) may not automatically be tracked, but the setup for these is now made much easier, and again requires much less time to implement than previous iterations of GA.
How to properly set up Google Analytics 4
Setting up GA4 isn’t a complicated process. It might take some time to get it running, but the actual process is fairly straightforward, and you can get things up and running with the 6-step walkthrough below.
Note: if you're a merchant on Shopify, you can easily connect your Shopify store(s) to GA4 via the new GA4 integration.
1. Set up Google Tag Manager (GTM)
GTM is a tool from Google that lets non-developers add tracking tags onsite, so you can send data from your site to Google Analytics and other marketing platforms where you’d want to track site activity.
There’s a learning curve for GTM, but it’s a versatile tool and lets you track virtually any interaction on your site. It’s worth learning how to use GTM.
In the long run, GTM makes your life easier because you or members of your team can edit, test, and publish tags without having to bug your developers or wait for development sprints. You can set up Google Analytics without Google Tag Manager, but doing so is going to require lots of code changes, and any updates will just be slower to implement.
Basic installation is simple. Just create a GTM account if you don’t have one already.
Then, set up a “container” that you’ll use for your website. There will be a javascript snippet unique to the container that you or your development team needs to add to every page on your site, and then you’re ready to start testing.
Instructions for GTM setup & installation.
2. Set up your eCommerce data layer
Getting eCommerce tracking right is the trickiest part of setting up a Google Analytics property.
The process starts with having a strong dataLayer. A dataLayer is a javascript variable that exists in the background on your webpage. Your website pushes information to the dataLayer, and then Google Tag Manager can grab information from the dataLayer and use it in logic for firing Google Analytics or marketing tags.
For example, when you land on a product detail page, your website needs to push information to the data layer, such as the product name, the product id, the price, and any other details that need to be passed to Google Analytics for eCommerce tracking (along with any optional info you want to include for advanced analysis).
Then, via a couple extra steps, GTM ingests that information and sends it off to Google in the correct structure.
Setting up the dataLayer is not simple, but luckily many eCommerce platforms have plugins, apps, and pre-built code templates that will automatically create the dataLayer for you. For Shopify, tools like Elevar (which is a great option) exist to do just that.
The best resource for learning about how to structure the dataLayer for eCommerce tracking is from Simo Ahava.
He has exhaustive blog posts on setting it up for Google Analytics 4, setting it up for Universal Analytics and even has some tools to translate the dataLayer into GA4 terms it has been set up for Universal Analytics.
3. Set up your GA4 account/property
Setting up GTM and the dataLayer is a lot of work, but the good news is the rest is downhill!
Before you start tracking anything, you need to set up a GA4 property.
- If you are brand new to GA, You’ll need to create an account to set up your very first GA4 property.
- If you already have a Google Analytics account, you just need to create a new GA4 property within that account.
If you’re used to Universal Analytics, you’ll notice the structure for GA4 is a little different from good ol’ Universal Analytics.
Universal Analytics’ structure includes:
- Accounts: Each can contain tracking for multiple sites.
- Properties: Each comes with a single tracking ID. Typically, you have one property per domain, or 1 for each group of closely related domains.
- Views: Each view is a filtered version of the data collected at the Property level.
Google Analytics 4’s structure is a little different (although things are very fluid with GA4 and things can change rapidly):
- Accounts still function the same way
- A property isn’t limited to a single tracking ID. Instead, each property can be linked to one or more Data Streams that each have their own unique tracking ID. So, if you’re a larger merchant who has a website and an app, in theory you could have 1 data stream for your app with its own tracking ID and 1 data stream for your website with its own tracking ID, and both would flow into your same property.
- There are no “Views” 😱This may pose challenges for merchants because view-level filters are important for filtering unwanted traffic out of your data: the current options for filtering traffic don’t exist in GA4.
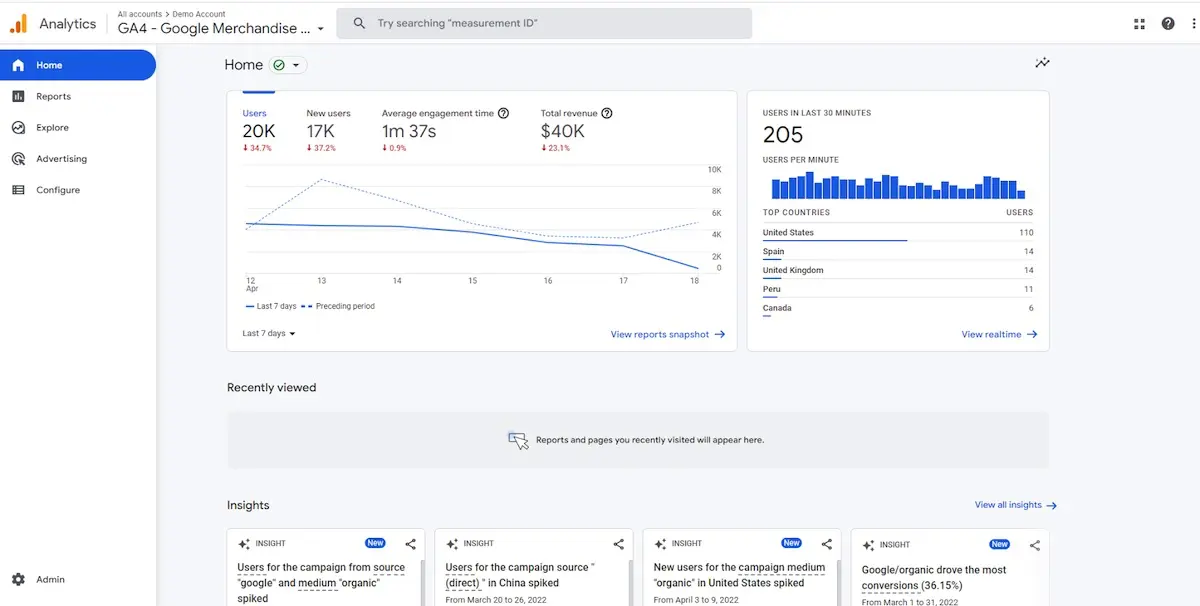
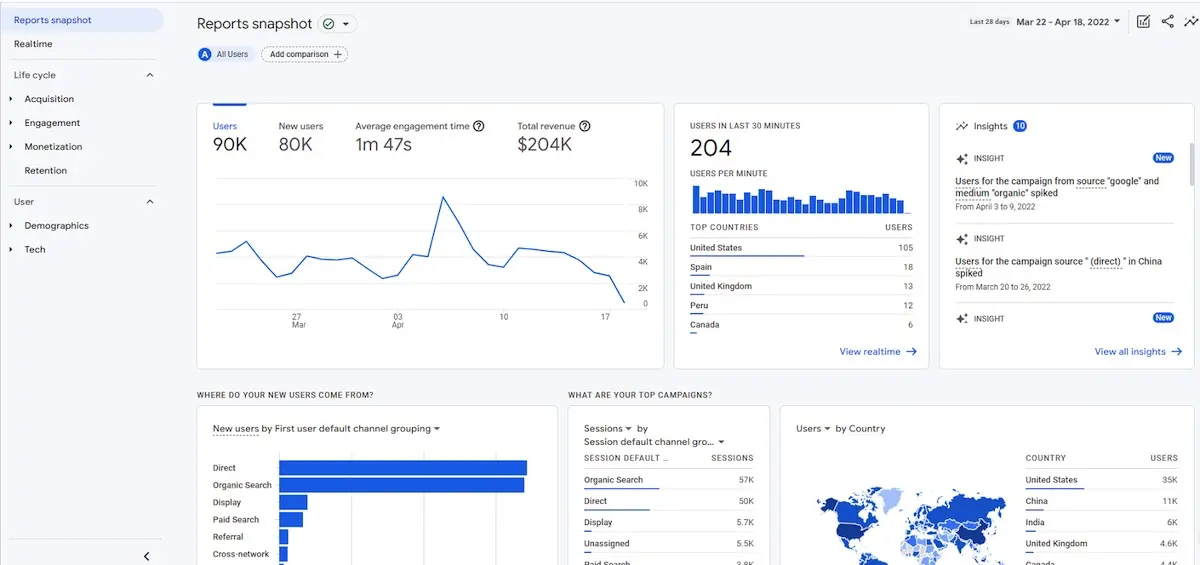
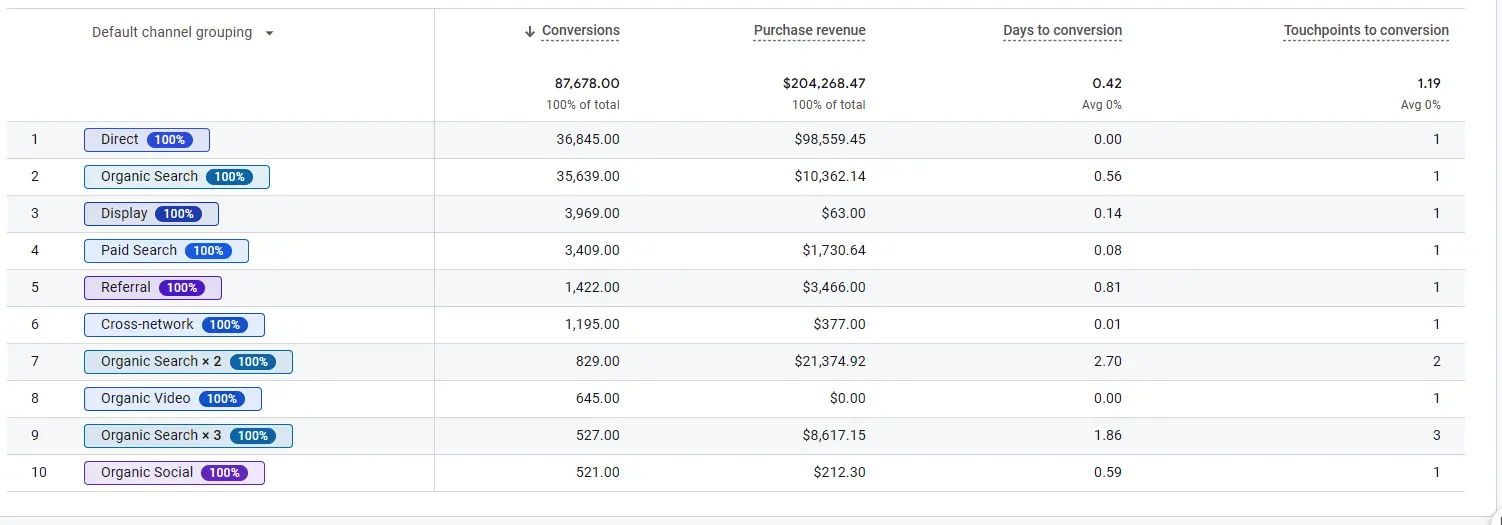
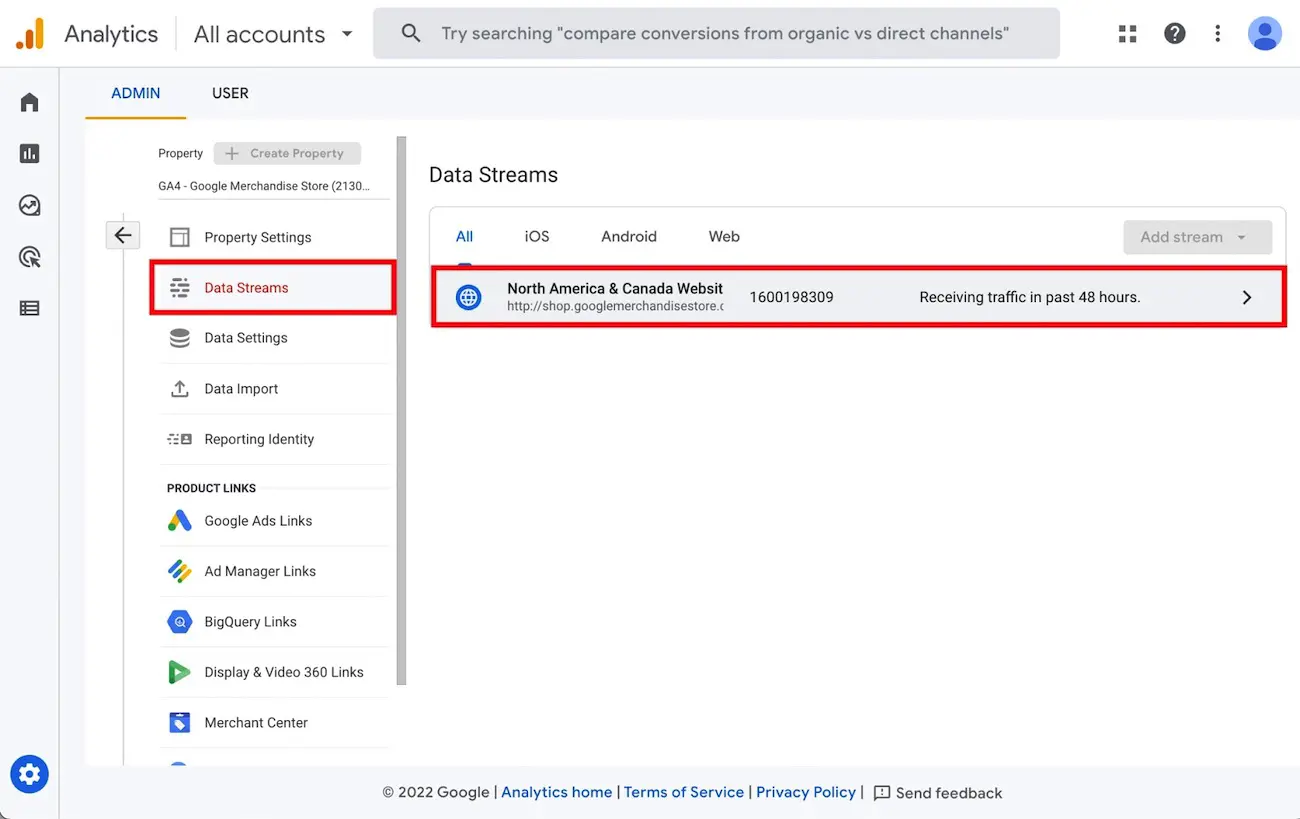
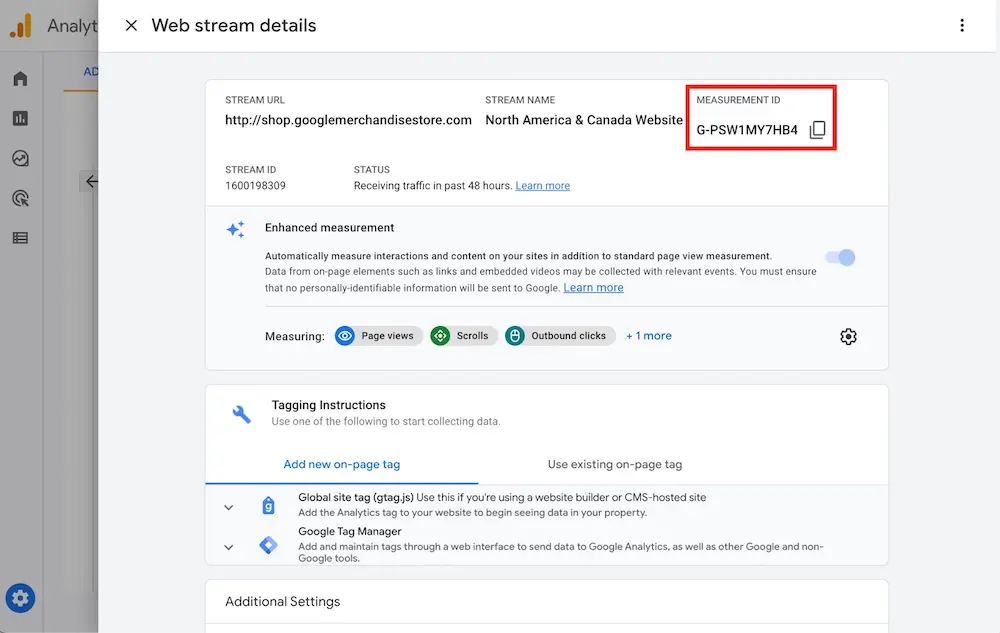
- When you go to set up your tags in GTM (see next section), you’re going to need the stream MEASUREMENT ID.
You can find this in the GA admin under Property > Data Streams and choose the data stream you want to track with. This page will have the Measurement ID in the upper right (see next three screenshots):

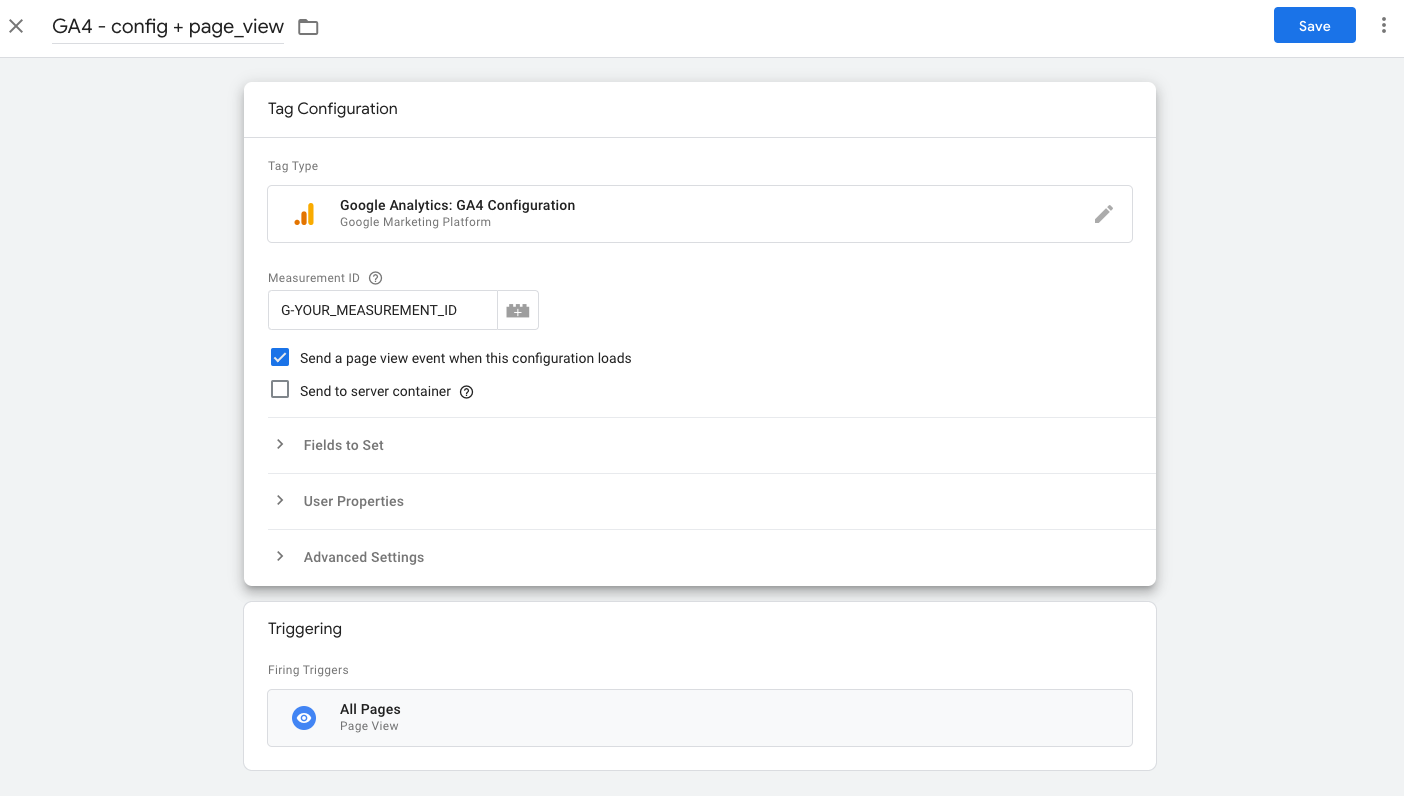
4. Set up your first tag
With your dataLayer & your account set up, it’s time to hop into GTM, set up your first (and most important) tag, and get some data flowing!
The tag: pageview tracking.
Pageview tracking will do two things:
- Ensure that a pageview event will be tracked whenever someone loads a page on your site
- Set up the configuration (MEASUREMENT ID and other basic settings) that all of your other tags will use. Whenever you set up a new tag, you will connect it to this configuration tag, so you don’t need to repeat your configuration settings in all the other tags you’ll be setting up
To set up pageview tracking, go to create a new tag in your GTM account, choose the Google Analytics: GA4 Configuration tag type, and fill in the settings similar to the setup below:
5. eCommerce tracking
Once you have the dataLayer correctly set up and the proper info is surfaced so Google Tag Manager can work with it, you can start setting up other tags.
We won’t go into the details of each, but be aware that it will take some time, and you should test extensively before wrapping up the project.
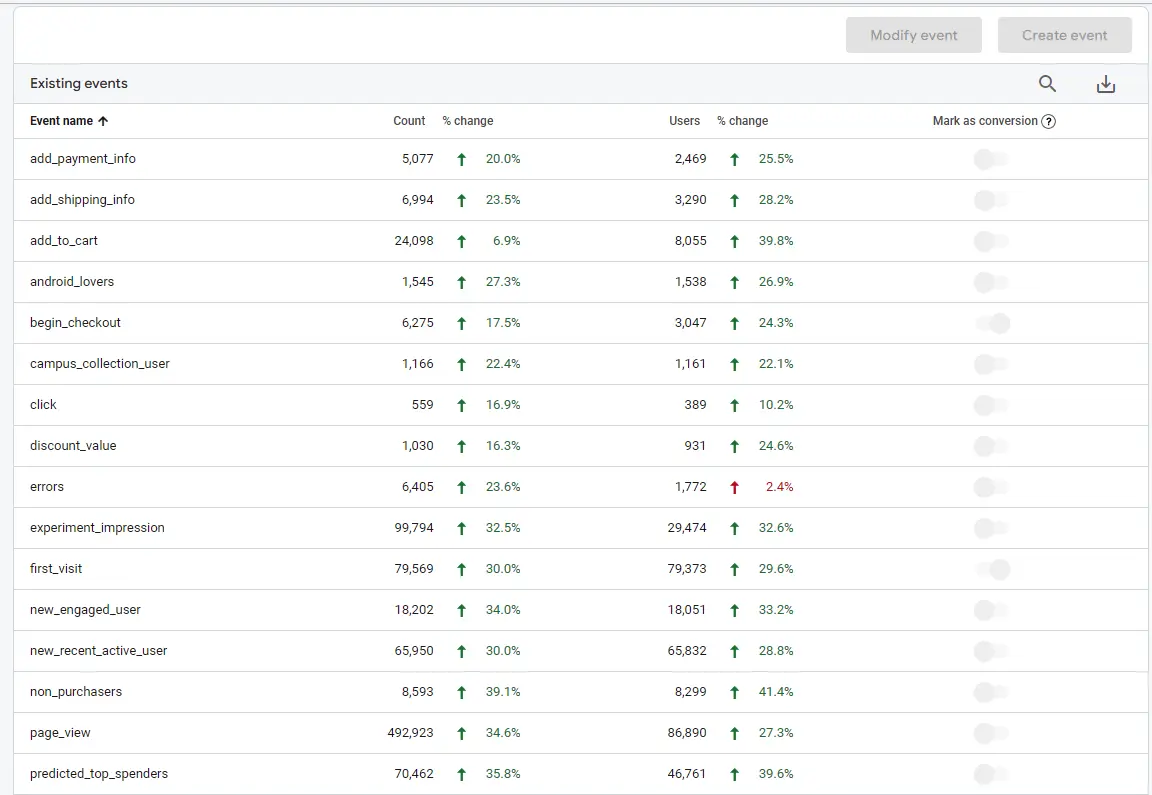
When you’re done, you should at minimum have tags for the following GA4 events set up to have visibility into the core eCommerce shopping flow:
- view_item: This event fires any time a user views a product detail page. (You may also want to fire them when a user selects “Quick view” from a product list page. If you are tracking “Quick view” product views, you’ll want to populate the item_list_name field with this even so you can see which product lists are driving the most views.)
- add_to_cart: Fire this event whenever a user adds an item to their cart
- view_cart: Fire this whenever a user hits the cart page
- begin_checkout: Fire this at the first step of your checkout funnel. Typically this would be the first page load after the cart page
- add_shipping_info: Fire it when the user has successfully entered their shipping information
- add_payment_info: Fire it when the user has successfully entered their payment information
- purchase: Fire it when the user has successfully placed an order. Your dataLayer setup will be crucial in determining how much detail you get about your transactions.
Once these events are set up, you must do extensive testing to understand how your transaction data will be reflected in your GA4 interface.
6. How to optimize GA4 for eCommerce tracking
The basic setup for GA4 includes standard events you’ll want to track. We also recommend setting up a few additional events. We call these bonus events because they aren’t part of the core shopping funnel.
Product list & promo tracking
Google doesn’t yet provide the same value from these metrics in GA4 as they did in Universal Analytics. But there still is some value you can get from them in the short term, and hopefully, the same great reporting will come to GA4 as in Universal analytics.
Product list tracking
A common question you’ll probably want to answer about your site is how effective your product list pages are at driving customers onto your PDPs.
Google Analytics attempts to help you do that with 2 types of events:
- view_item_list
- select_item
These events are associated with lists of products—either standard category pages, product carousels that might be featured on your home page, or product recommendation lists featured throughout your website.
Fire a view_item_list event whenever a user views an item in one of these lists, and fire select_item whenever they click on an item from a list.
For each of these events, you’ll need to include the following details:
- item_list_name: We recommend either including the page name for category pages, or a descriptive name for product recommendation lists, e.g.: You May Also Like or e.g., Complete The Look
- item_list_id: We recommend passing the page URL for category pages, and duplicating the item_list_name for other types of lists.
- index: The order of the product in the list. For example, if the user clicked on the 5th item in a product list, the value would be 5.
- items: i.e., Details about all the items in the list
With this data, you can find things like:
- Clickthrough rate for each product in each list: Which product lists are getting high views but low clickthrough rates?
- Clickthrough rate by product position: How much does clickthrough fall off as you get deeper in your product list pages?
- Where users are discovering certain products: Which product lists generate the most clicks for Product X?
- How effective are your recommendation widgets?
If Google introduces the same reporting to GA4 currently available in UA, you’ll also be able to see how much revenue each product list drives on a last-click basis.
Promo tracking
Another question marketers also want to know but may not know how to track is engagement with promotional sections on their site.
For example, you may have a pretty deep home page with lots of different items visitors can click through to dig deeper into your site.
Do you know which ones they’re clicking and which ones get the highest clickthrough? Promo tracking helps you answer these questions.
Similar to product list tracking, promo tracking has standard events for promo views (event name: view_promotion) and promo clicks (event name: select_promotion).
For each of these events, you have 5 information slots you can use to describe the promotion that’s being viewed/clicked:
- promotion_id
- promotion_name
- creative_name
- creative_slot
- location_id
You can use these to describe the blocks users can interact with on your home page.
With this data, you can calculate clickthrough for each individual element on your home page, see which are most popular, and, if Google enables the same reporting in GA4 as they do in UA, you’ll also be able to see which promotions drive the most revenue on a last-click basis.
Custom events you should track
In addition to the events we’ve covered, you should also set up any other events that are meaningful to your business. Here are a couple of other events Google recommends you set up:
- login: You can also include a method event parameter in case you want to segment by login methods or specify at what point in the site flow a user might log in.
- sign_up: Again, you’re also given a method event parameter to specify where the user took the signup action (e.g.: new user signup page, footer signup form, subscription modal).
For any other event that you want to set up, you can! Just be aware:
- The event name should be all lowercase and snake case (meaning you should replace any spaces with underscores)
- There aren’t any Category/Action/Label fields like there are in Universal Analytics, only event parameters that you can name whatever you’d like
To send an event parameter, define them in the Event Parameter of the tag setup page. The Parameter Name field must follow the same rules as event names, but the value can be anything you want.
It can be a static value or a dynamic variable you define elsewhere in GTM:
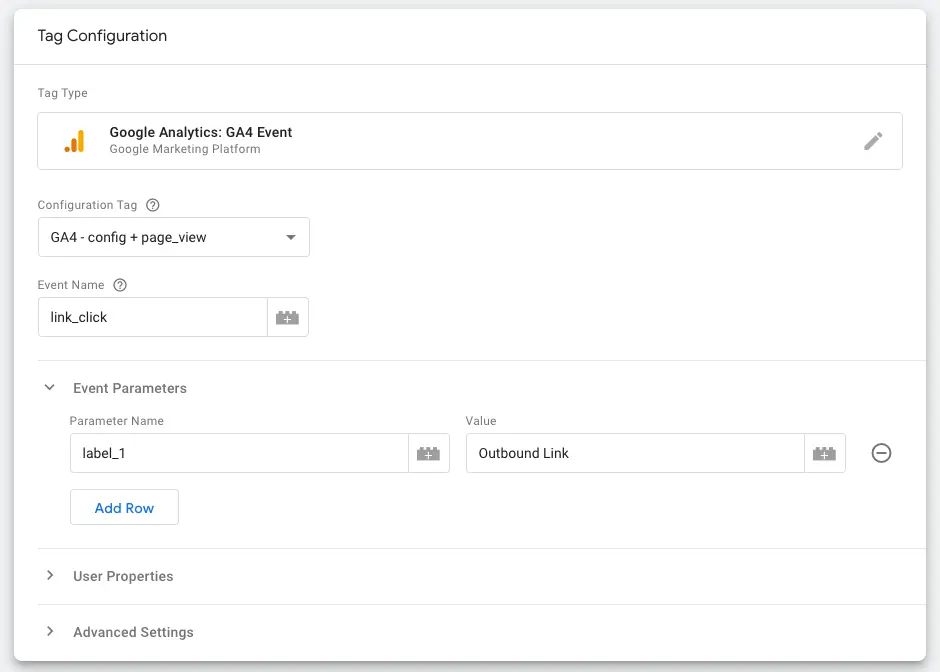
Just remember that when you set up a new event parameter, you need to register it in your Google Analytics property before you will start seeing it in your reports:
Pro tips for GA4
Set up your BigQuery export
One of the most incredible features of Google Analytics 4 is that everyone can get access to the raw event data collected by Google.
This was previously only available to Google Analytics 360 users (which cost them over $100k/year) but is now free to everyone!
Using this data is an advanced use case, but even if you don’t have a SQL analyst on your team yet, you should set up the export as soon as you can, because you can’t populate the database retroactively.
Setting up the BigQuery export is free, but you will need to create a Google Cloud Platform account and enter a credit card. However, you won’t actually start being billed until you start using the data for analysis, and even then your price tag will be pretty low unless you’re doing heavy querying.
Basic steps are to:
- Set up a Google Cloud Platform account and project for the BigQuery export
- Create a user that will have access to export your data
- Link your BigQuery & GA property in your GA settings
- For full instructions, head here.
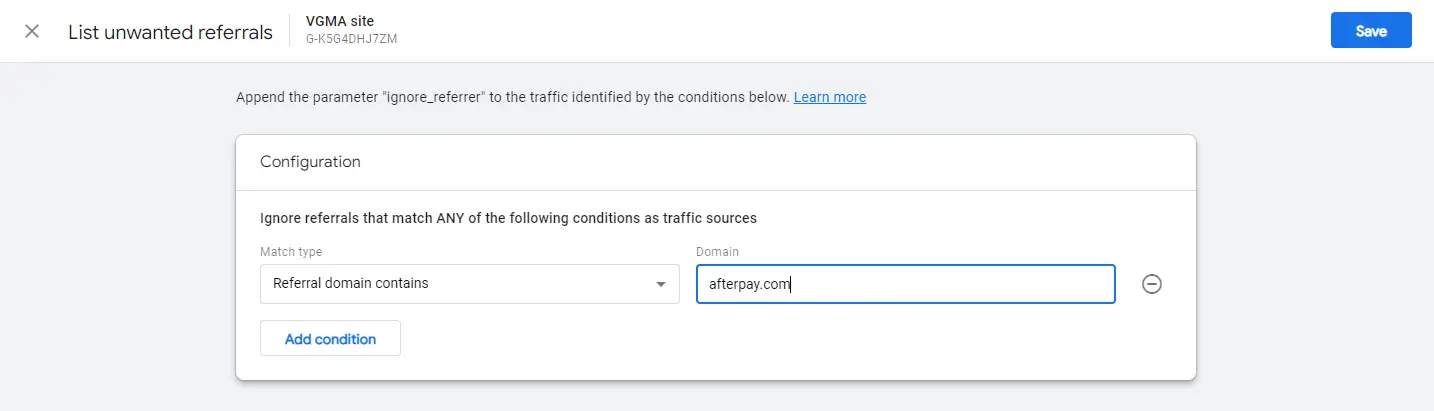
Exclude external payment gateways
If you use external payment gateways like Paypal, Affirm, or Afterpay, it’s important to include them in the referral exclusion section. If you don’t, you’ll see them show up in attribution for your transactions and take credit away from your true marketing sources.
This setting is buried pretty deep in the Admin section. To navigate here:
- Click on your website data stream in the admin
- Click the More Tagging Settings button toward the bottom of the page
- Click List unwanted referrals
- Add an entry for any external payment gateways that might be directing traffic to your site (e.g.: paypal.com, affirm.com, afterpay.com):
Understand how sessions and your attribution method work in GA4
The biggest change between the core data models of Universal Analytics & Google Analytics 4 is how sessions and attributions are calculated.
In Universal Analytics, a “session” started whenever you came to the site with a new source/medium/campaign combination. So, if you clicked through to a site from a Google Search Ad and two minutes later clicked through to a site from a Facebook Ad, that would be considered two sessions.
In Google Analytics 4, however, a session is started whenever a user visits your site without having been on your site in the past 30 minutes. In the above example, with one ad click from Google Search and a second from Facebook, that would be the same session, and the session would be attributed to Google Search.
This is a significant change to Google’s data model, and it means you’ll likely see a lower session count in Google Analytics 4. It will also make a big impact if you have a lot of traffic from sites like Retailmenot or Honey.
Consumers often will come to your site through a marketing channel, get close to checkout and then, in a separate tab, search a coupon site for coupons to your store. If they clicked on one of those links to get back to your site, it would start a new session, since this is a new traffic source. But in GA4, that won’t be the case—it’ll all just be a single session.
In Universal Analytics, the only attribution model you could use for standard reports was “non-direct last click,” which meant a conversion would be attributed to the last marketing channel the user interacted with.
So, even if you had 5 clicks on Facebook ads before clicking on a Google Search ad, if you converted after clicking from Google Search, Google Search would get all of the credit. Each transaction could be attributed only to a single traffic source.
The default attribution model for GA4 is Data-Driven attribution, which is a huge shift.
This means Google will calculate how important each traffic source was in the path to conversion, and attribute it a fraction of the conversion value. By default, it looks at a user’s past 90 days of activity, but you can change that to 60 or 30 days under Attribution Settings in your property settings if you want to adjust it.
So, while in Universal Analytics each transaction could only be attributed to a single source/medium/campaign combo, GA4 will take a data-driven approach and potentially distribute value to multiple source/medium/campaign combos.
Another big shift is that Google will now let you change your default attribution model. If you go under “Attribution settings” in your property settings, you can choose from Data-Driven, Last Click, First Click, Linear, Position-based, or Time Decay (for more information, we have a full-guide to these kinds of multi-touch attribution models).
How Daasity makes analytics easier (and helps with GA4)
Daasity is a data and analytics platform built for consumer brands selling via eCommerce, Amazon, retail, and wholesale. Daasity centralizes your data and allows you to track vital metrics from one platform. With Daasity's single, unified view, you can accurately measure the data from GA4 and use it to inform your future marketing and ad campaigns to grow your business.
Daasity normalizes Universal Analytics with GA4 data. So, if you use Daasity while on UA and switch to GA4, you can look at the same metrics/data and see how your data has changed after the switch.
To learn more, check out a demo.

%20(1).png)
